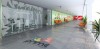
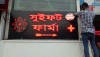
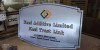
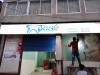
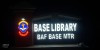
"Boost Your Brand with Custom Panaflex Signboards!"
For sale by: Md.Ziaur Rahman Khan, 15 Jul 2024 07:13 pm Location: Dhaka, Dhaka, Jatrabari

Shere This Ad: 
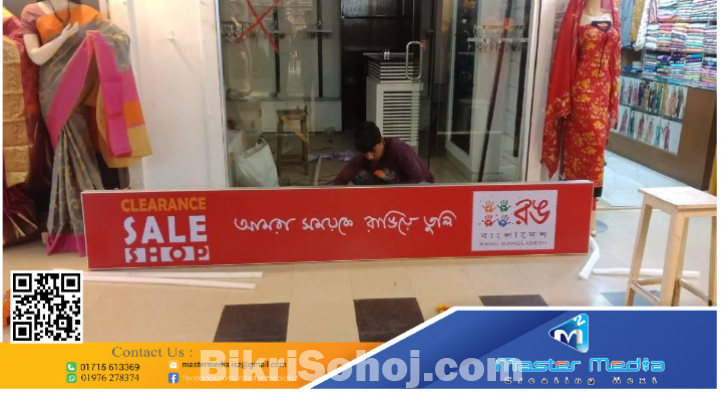
                                            Creating an aluminum profile Penaflex lighting signboard involves combining the flexibility and weather resistance of Penaflex sheets with the structural support and sleek aesthetics of aluminum profiles. Here’s a step-by-step description of how such a signboard is typically made:
1. **Design and Planning:**
**Client Consultation**: Understand the client’s requirements for the signboard, including size, shape, content (graphics, text), and placement location.
**Graphic Design**: Create or receive the artwork that will be displayed on the signboard. Ensure the design is suitable for digital printing or vinyl application on Penaflex.
**Size and Shape Determination**: Based on the design and location, decide on the dimensions and shape of the signboard.
2. **Material Selection:**
**Penaflex Sheets**: Choose the appropriate Penaflex material considering factors like thickness, color options, and outdoor durability.
- **Aluminum Profiles**: Select aluminum profiles suitable for constructing the frame of the signboard. These profiles should be sturdy, lightweight, and weather-resistant (typically aluminum alloy such as 6063-T5).
- **LED Lighting**: Decide on the type of LED lights (usually strip LEDs) that will be embedded within the signboard for illumination.
3. **Fabrication:**
- **Cutting and Shaping**: Cut the Penaflex sheets to the desired size and shape using appropriate cutting tools.
- **Graphic Application**: Apply the graphics onto the Penaflex sheets using digital printing or vinyl lettering techniques. Ensure the graphics are accurately aligned and securely adhered to the Penaflex.
- **Aluminum Frame Construction**: Cut the aluminum profiles to match the dimensions of the Penaflex sheets. Assemble the profiles to create a frame that will encase the Penaflex sheet and provide structural support.
4. **Assembly:**
- **Integration of LED Lighting**: Install the LED strip lights within the aluminum frame, ensuring they are evenly distributed for uniform illumination of the Penaflex sheet.
- **Connection and Wiring**: Connect the LED lights to a power source, ensuring all electrical connections are secure and properly insulated.
5. **Finishing and Installation:**
- **Weatherproofing**: Apply weatherproof coatings or sealants to the aluminum frame and edges of the Penaflex sheet to protect them from outdoor elements.
- **Quality Assurance**: Conduct thorough quality checks to ensure the signboard meets design specifications, including proper functioning of the LED lights and clarity of the graphics.
- **Installation**: Mount the completed signboard at the designated location using appropriate mounting hardware and techniques. Ensure it is securely fixed and positioned for optimal visibility.
6. **Testing and Handover:**
- **Functionality Test**: Test the signboard to ensure all components are functioning correctly, including the LED lights and electrical connections.
- **Client Handover**: Provide the client with instructions on how to operate and maintain the signboard, including cleaning tips and periodic checks for maintenance.
Creating an aluminum profile Penaflex lighting signboard involves a combination of graphic design, precise fabrication of materials, electrical expertise for LED integration, and careful installation to deliver a durable and visually appealing signage solution suitable for outdoor use.
Similar ads
More ads from Md.Ziaur Rahman Khan

Showroom & Office Branding, Printing
15 Jan 2020 12:24 pm
TK 500

Acrylic Mattel latter Sign & Digital printing
28 Jan 2020 01:07 pm
TK 1,000
Office & showroom branding With digital Printing
28 Jan 2020 01:13 pm
TK 500

Acrylic 3D Box letter, Lighting Signboard Making
22 Feb 2020 02:06 pm
TK 1,400

All Kinds Of Signboard making & Fitting, Digital Printing
10 Mar 2020 09:20 pm
TK 1,000

All Kinds Of Digital Printing & Solid Color Sticker Cutting
16 Apr 2020 11:28 am
TK 200
.jpg)
Signboard Making, Office & Showroom Branding, Printing
28 May 2020 11:51 pm
TK 1,000
Acrylic, Acp, Wood, Glass nameplate And Signboard
02 Jul 2020 06:07 pm
TK 1,000

PanaFlex Lighting Signboard & Led 3D Lighting Sign making
05 Aug 2020 01:10 pm
TK 500
LED 3D Lighting Signboard Office & Showroom Branding
09 Aug 2020 01:32 pm
TK 1,000
Pana Signboard, SS 3D later Sign, Any Kinds Nameplate Making
16 Aug 2020 06:49 pm
TK 1,000
Nameplate: Acrylic, ACP, SS Top Later Making & Signboard
24 Aug 2020 06:05 pm
TK 1,000
PanaFlex Lighting Signboard SS 3D Top later Sign & Nameplate
29 Aug 2020 06:00 pm
TK 500

Ceramic Mug, Plate, Print With Customized Design
20 Jun 2021 11:35 am
TK 200
Acrylic & SS Top Letter and LED Lighting Outdoor Signage
20 Jun 2021 11:41 am
TK 1,050
LED Bata Model Later & 3D Box Latter Making with Fixing
18 Dec 2021 10:05 am
TK 1,200